Outpost PMM and the SCS DSP Tracker TNC
The purpose of this document is to help the end user set up Outpost PMM to interface with the SCS Tracker / DSP TNC (the Tracker) for the Virginia Packet Network (VAPN). This document assumes the end user is familiar with the features and functions of the Tracker. See SCS’s documentation for all for details on the Tracker.
Beginning with release 3.3 of Outpost PMM, features were added to support the Tracker. These features primarily concern the Interface Setup dialog. This will be an overview of where those settings are and what and how they are used. This is just an example and will vary for each user’s situation.
Define a new TNC
From the Main Menu bar select Setup → Interface. Select New and you are presented with the Define New TNC dialog:

Here you give your device a name and description. Select TNC as the Interface Type and “SCS TNC” as the TNC type.
Tip: You can set up one “TNC” for each speed mode of your SCS DSP Tracker (R300, 1200, 9600, etc.) to make for easy speed select.
Device setup for SCS R300: Prompts
Select the Prompts tab. Below is an example. There are three entry boxes on this screen.

- Command prompt entry for the Tracker is an asterisk, so “*” should be entered in field
- Timeout prompt should be set to “*** retry count exceeded”
- Disconnected Prompt should be as “g* (n) DISCONNECTED” where the value “n” is the channel number defined under the “Init Cmds” tab. This will be explained in greater detail below.
Device setup for SCS R300: TNC Cmds
The next tab is the TNC Cmds where you tell Outpost what to send to the Tracker.

These are command values as defined in the SCS documentation for the Tracker. The first three are self explanatory and the “Convers Mode” and “DateTime” fields can be ignored, use the default values. The “TNC Command Prefix” box is important. Verify that the checkbox is checked and that Cmd Prefix is set to 27. This is the ASCII value for the “ESC” character that proceeds commands to the Tracker.
Device setup for SCS R300: Init Cmds
The “Init Cmds” tab is where other commands and values that meet your local needs are defined, both before and after the Send/Receive sequence.

You must, however, at the very least enter the “S” command. This defines which channel for this particular instance. As a default the Tracker is set to channel 0. Channel 0 is used for UI (or unnumbered information) and is used for the Tracker’s built in APRS feature. To use as a traditional TNC you need to select a channel 1 – 9. The number you use here must be the number you enter in the “disconnected” value in the Prompts tab above.
You can also select the different protocol modes available with Tracker using the %B command. In this example we use R300 for 200/600 Robust Packet automatic selection of speed. For 1200 AFSK the value would be 1200, 9600 for 9600 FSK and, if you have the proper radio gear, 19200 for 19200 FSK.

BEWARE OF UNEXPECTED MODEM SETTINGS
Often the defaults in the Tracker TNC are good, but as it gets used for tasks, those values might change to be incompatible with Outpost. Here is a comprehensive list of TNC parameters you might consider setting in the Init Cmds of figure 4…
- I +CALL – Mandatory – Gotta have a callsign set or it will never transmit.
- %B R300 – Mandatory – Mode setting 300, R300, R600 1200, 9600 or 19200.
- %XA – Adjust for your transmitter – Output amplitude in mV for 300/1200 baud AFSK
- %XF – Adjust for your transmitter – Output amplitude in mV for 9600 and 19200 baud Direct-FSK
- %XR – Adjust for no ALC on your transmitter – Output amplitude in mV for R300 and R600 Robust-PR.
- S 1 – Mandatory – Set to anything from channel 1 to 10, but never 0 as that is UI beacon only. Keep note of your channel selection for later.
- M N – Mandatory – The Tracker has a wonderful monitoring capability that displays useful information about every frame, but this is taboo for Outpost that expects the TNCs to provide a transparent interface directly with the node’s prompts. Ensure monitor is set to disabled (N).
- %L 1500 – Good idea = Ensure the center frequency (audio) is 1500 Hz for Robust Packet.
- F 500 – Good idea – FRACK in 10ms increments – in the Tracker this value is dynamic, but you need a good start value and 5 seconds isn’t a bad choice.
- @T2 150 – Good idea – AX.25 Timer 2, delay before ACK in 10ms increments. Default is 150 (1.5 seconds). Experiment with this value if you wish to tighten up the back and forth between packet systems. Hint, sometimes you can get away with a value of zero, but that’s cutting things close.
- @T3 18000 – Default.
- N 2 – Packet retry counter. You can experiment with the value for most modes.
- O 2 – Number of frames up to 7 you can pack into a single transmission. Two is a good conservative value, but feel free to experiment. I believe Robust Packet max is 2 regardless of setting.
- P 32 – Persistance. 32 is fine to start.
- R 0 – Ensure digipeating is off.
- T 25 – Transmit Delay – Experiment with this, but 25 (1/4 second) is a good default to ensure your radio is all settled before sending actual data.
- %N 0 – Transmit hang time after data transmission is done. 0 probably works for most.
By associating a particular setup with an Outlook Profile you can have custom settings for different TNC speeds, systems, conditions whatever.
Device setup for SCS R300: Com Port
The last tab that needs to be configured is the Com Port tab.

Set the Comm Port to the appropriate com port on your PC. There are two speeds on the Tracker depending in how DIP-Switch is set, either 38400 or 115200. Set Max Speed to what is set on the Tracker. The rest of the values should be set as they are above.
Click Apply to accept all the above.
BBS setup for W4VPN and the Tracker
At this point you need to set up a new BBS for use with W4VPN and the Tracker. From the main menu select “Setup”->”BBS…” and select the “New Button”.
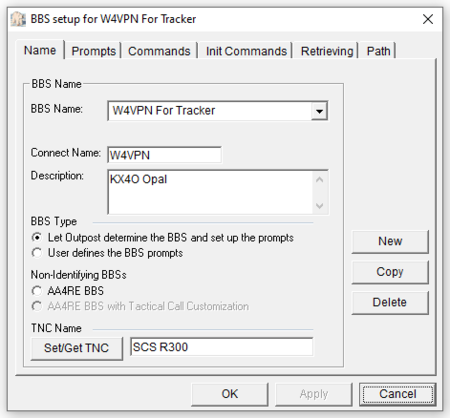
You can enter what ever friendly name in the BBS Name field. Set the “Connect Name:” field to “W4VPN”. You can put any description that is meaningful for your situation. Then use the default “BBS Type” radio button. IMPORTANT: In the “TNC Name” you need to get the TNC that was defined previously in this article.
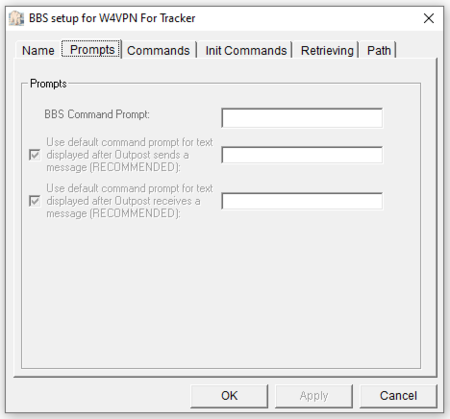
You may leave the “Prompts” tab value blank.
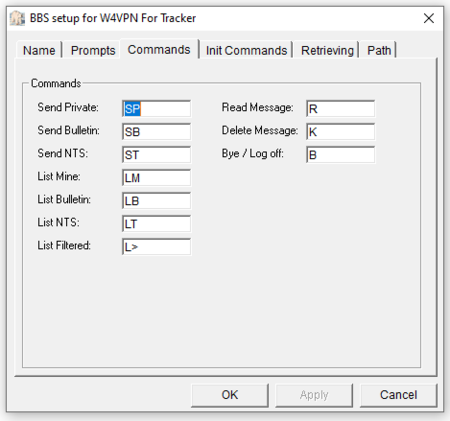
For the “Commands” tab, Outpost should default to the values above. These are standard BBS commands.
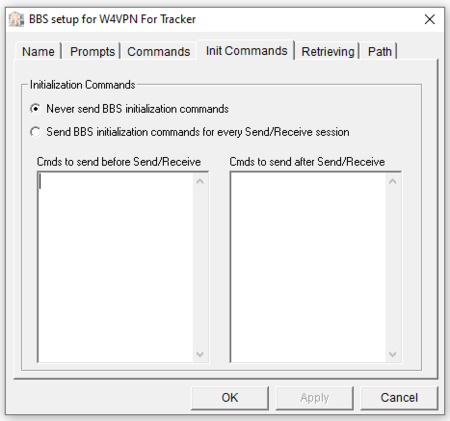
With the “Init Commands” tab, Outpost defaults to never and that is the case for W4VPN’s BBS.
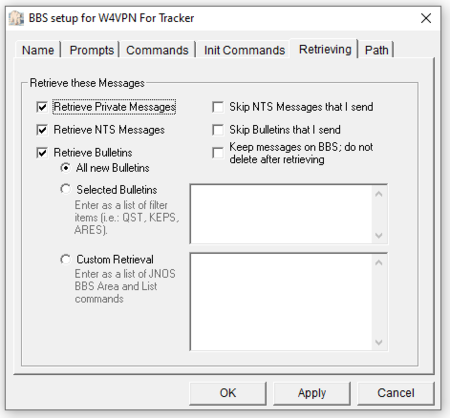
You want to pay attention to the values in the “Retrieving” tab. These control the messages you download from the BBS system. For example if you are not expecting NTS messages then you can leave that check box unchecked. If you want to retrieve Bulletins then select the corresponding checkbox. When defining a new BBS the default value is to only retrieve Private Message. The above example gets all messages, then deletes Private messages from the BBS. Bulletins and NTS messages are not deleted.

The Path tab in Setup:BBS needs to be set properly for use with W4VPN and the tracker. Press the “New” button. The first field that needs filled in is the “Node Name” which in our case needs to be “W4VPN”. The “Successful Connect Message:” and “Unsuccessful Connect Message” fields need to be set as above. Note the number in parenthesis. These numbers need to equal the channel number set above. Set the “Connect command” to “BBS” to drop Outpost into the VAPN Bulletin Board System. Enter “0” in the “Port Number” field. Leave the other fields with their default values.